No. 3.5.3
Base Material Repair, Edge Transplant Method
OUTLINE
This procedure is used to repair mechanical or thermal damage to circuit board base
material. This method is used when extended areas of base material must be
completely replaced. This method may be used on single sided, double sided or
multilayer circuit boards or assemblies.
CAUTION
Surface circuits may need to be replaced in the damaged area. Be sure that the
appropriate circuit diagrams, or photographs reflecting the original circuits
are available so that they may be replaced after repairing the base board
material. Damage to internal circuits or planes may have to be restored using
surface wires.
TOOLS & MATERIALS
Ball Mills
Base Board Repair Kit
Base Board Material
Brushes
Cleaner
Color Agent
End Mills
Epoxy
Foam Swabs
Knife
Micro Drill System
Microscope
Milling Machine
Oven
Precision Drill System
Saw
Scraper
Tape, Kapton
Wipes
PROCEDURE
- Clean the area
- Cut away the damaged board material using the Saw or milling cutter. Remove
all evidence of the damaged material. No fibers of laminate material should be
exposed. File the edge to ensure that the edge is flat. (See Figure 1).
CAUTION
Exercise care to avoid damage to any internal conductors. If any internal
conductors are damaged, surface wires may be required to restore electrical
connection.
- Clean the area.
- Install a carbide saw into the Micro-Drill System. Set the speed to maximum
and machine a groove in the edge of the circuit board where the new base material
will be installed. The groove must be centered in the edge to ensure that the
new piece will fit properly. The groove width should be approximately 1/3 of the
PC board thickness. The groove depth should be approximately double the groove
width. (See Figure 2).
- Cut a piece of replacement base board material that is the same thickness
and type as the piece removed. The replacement piece may be oversized, the
excess material will be removed after the replacement piece has been epoxied in
place.
- Install an end mill into the chuck of a milling machine. Machine a tongue
onto the entire mating edge of the replacement base material. The dimensions of
the tongue should match the size of the milled groove. (See Figure 3).
- Where required apply Kapton tape to protect exposed parts of circuit
board bordering the prepared area.
- Check the fit to be sure the new base material properly mates with the
groove in the circuit board. (See Figure 4).
- Mix the epoxy.
- Coat both the tongue and groove surfaces with epoxy and fit together. Remove
excess epoxy.
- Cure the epoxy per Procedure 2.7 Epoxy Mixing and Handling
- After the epoxy has cured remove the Kapton tape.
- If needed, scrape off any excess epoxy using the knife or scraper.
NOTE
If needed, apply additional thin coating to seal any scrapped areas.
- Saw or mill off excess base material and file flush with existing edge. (See
Figure 5).
- Clean the area.
- Complete by drilling holes, slots, etc. or adding circuitry as required.
(See Figure 6).
- If needed, replace solder mask or conformal coating. (See Figure 6).
EVALUATION
- Dimensions of area replaced should be checked to conform to specifications
required.
|
|
|
Solutions Across the Board
TM
|
|
|
|
Product Class: R/W
Skill Level: Expert
Conformance Level: High
Revision: D
Revision Date: Jul 7, 2000
Repair Service Charge
Damaged Base Material
Figure 1: Cut away damaged base material with the Saw or milling cutter.
Figure 2: Cut a groove into the edge of the circuit board.
Figure 3: Mill a tongue onto the edge of the replacement base material.
Figure 4: Check fit of new base material. The tongue must mate with the groove
in circuit board.
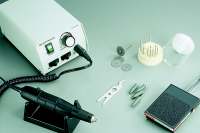
Figure 5: Micro-Drill
System.
|
Tricks of the Trade
Wow! This is a challenging repair procedure and should not
to be attempted by rookies. You may want to send this one out. See
Base Board Repair for more info. We recommend
pre-packaged epoxy to bond the replacement material in
place. Mix a Color Agent in with the epoxy if needed.
You'll need a Precision Drill System and a Micro-Drill if you plan to attempt this one in-house.
|
Real Problems, Real Solutions
Improperly setup routing equipment trimmed 420 circuit
boards to the wrong size. Instead of routing the circuit boards 6.60" wide,
they were routed 6.06" wide. If these assembled boards were routed oversize, instead
of under size, the correction would be as simple as milling off the excess
material. Unfortunately the error was not discovered until the boards were
assembled. Believe it or not, things like this actually happen. The call went
out to Circuit Technology Center. A modified version of
this edge transplant method was used. As described in step 4, a groove was machined along the entire
edge that needed material to be added. Oversize replacement pieces, as shown in
figure 3, were fabricated to fit along the entire length of the edge. Once the
new material was bonded in place the excess material was removed by milling. The
boards were valued at $700 each. Rework charge was $37 per board.
Total Value $294,000
Total Charge $15,540
Total Savings $278,460
|
|
|

